
When it comes to Minecraft, customization plays a significant role. However, it can be disappointing to discover that the options for customizing your character’s appearance are quite limited when you first start the game.
However, if you are a Minecraft player who enjoys the artistic and crafting elements of the game, you don’t need to worry. The possibilities for customizing your character’s appearance are practically endless.
If you are using the Java edition of Minecraft, you have the option to either find or create a skin, upload it, and use it in the game. On the other hand, Bedrock Edition users have access to even more customization options through its character creator tool.
How to make a Minecraft skin
In order to change your skin in Minecraft, the first step is to find a new skin that you want to use. The creators of Minecraft provide a selection of custom skins for free, often designed for special occasions. Additionally, you can explore websites such as The Skindex, where users share their own created skins that you can download and apply to your Minecraft character.
If you’re up for the challenge, you have the ability to create your own skin in Minecraft. This can be done by either modifying the pre-made template using software such as Photoshop, or by utilizing a web-based tool like the Minecraft Skin Editor.
How to change your skin on Minecraft Java
Time needed: 5 minutes
Step by step to change Skin in Minecraft Java.
- Open Minecraft Launcher
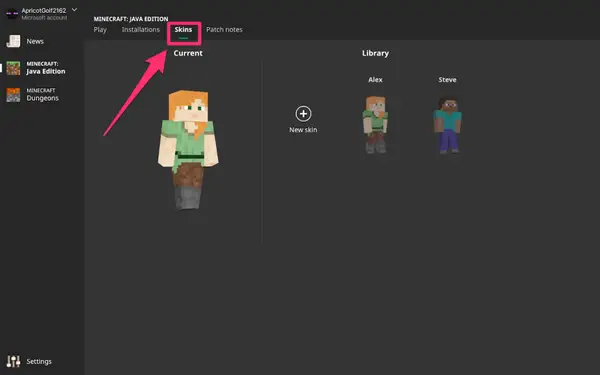
To change your skin in Minecraft, first, launch the Minecraft Launcher. Then, navigate to the top menu and Select Skins.
- New Skin
Click New skin to add a new skin
- Add New Skin
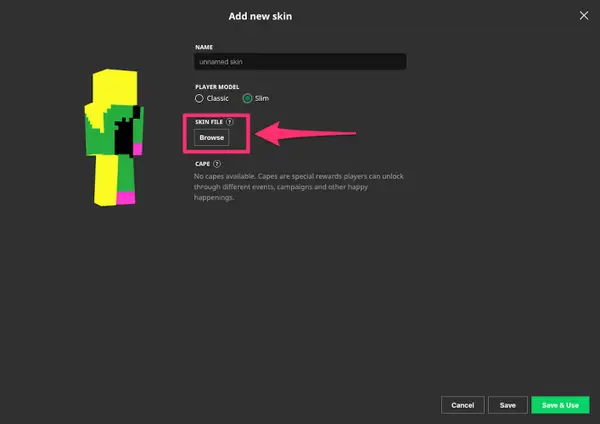
When you access the “Add new skin” page, click on the Browse button. Locate and choose the image you want to use as your skin, ensuring that it meets the required dimensions and is in PNG format. Finally, click on the Open button.
- Save & Use
Give your skin a name if desired. Then, select either the “Classic” or “Slim” size option. Finally, click on “Save & Use” located at the bottom-right corner. When you start the game, your character will be wearing the newly chosen skin.
How to change your skin on Minecraft Bedrock
Just like in the Java Edition, you have the option to change the skin of your character in Minecraft Bedrock. Whether you find a skin online or create one yourself, there are plenty of creative Minecraft players who are willing to share their unique skins. This means you can find a wide variety of cosmetics to customize your character in any way you can imagine.
Please be aware that the ability to change your skin in Minecraft is only accessible on your personal computer. It is not possible to import skins when playing on a gaming console.
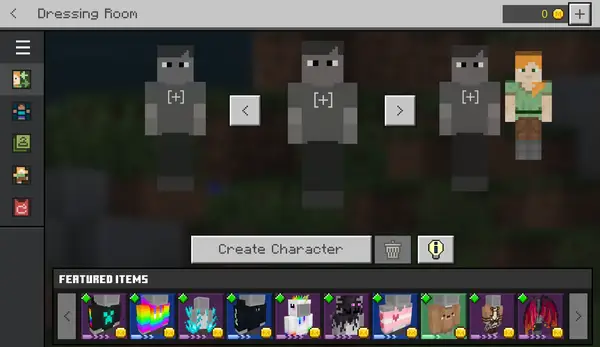
1. To change your skin in Minecraft, start by opening the Bedrock Edition game. Once the game is launched, look for the Dressing Room option located.
2. Scroll through the available characters and click Edit Character under one of your existing models, or select one of the blank slots and then click Create Character. If you’re making a new character, it doesn’t matter whether you pick Character or Classic Skin in the pop-up that appears.
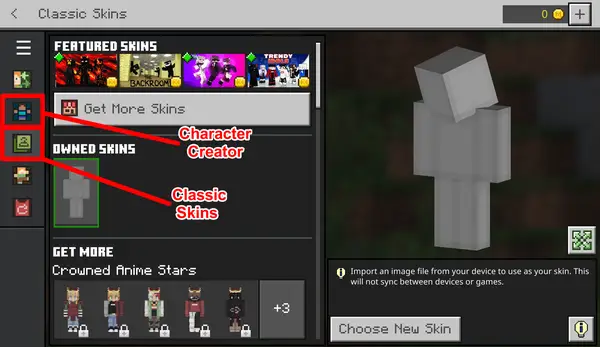
3. There are several methods available for altering your character’s skin in Minecraft. Within the left sidebar, you will discover two menus accessible through the icons.
In Minecraft, you have the ability to change your character’s skin by using the Character Creator menu. This menu allows you to carefully customize every aspect of your character’s
- The Character Creator menu lets you finely customize each part of your character’s body, as well as their clothes.
- The Classic Skins tab lets you buy a skin that someone else has made, or upload your own. If you want to upload your own, click the blank slot under Owned Skins, then click Choose New Skin on the right.
4. Once you have finished making changes to your character’s appearance, simply click on the Dressing Room icon located in the top-left corner. By doing so, all of your modifications will be saved and you can begin playing Minecraft with your newly customized character.
How to change your skin on Minecraft PE
- Using your mobile device, navigate to a website that offers Minecraft skins from external sources and proceed to download the desired skin you wish to apply.
- Launch the Minecraft application and click on the Dressing Room option.
- To change your skin in Minecraft, start by tapping on the three horizontal bars located at the top left corner of your screen. From the options that appear, select Classic Skins.
- Click on the Owned option, and then select the gray skin from the dropdown menu that appears.
- Click on the option that says Choose new skin and then choose the image or photo that you want to use.
How to change your skin on a game console
If you want to change your skin in Minecraft on a game console, the process is similar to Minecraft PE.
To change your skin in Minecraft, instead of the three horizontal bars, you need to press the designated shortcut button shown or move your joystick to the left to expand the menu. On a PlayStation 4, the shortcut button is called Options.
Conclusion
Skin is one of the most important elements in Minecraft. It’s no wonder that many Minecraft players are currently looking for ways to replace Skin. This article is for all Minecraft players on all platforms.


Leave a comment