


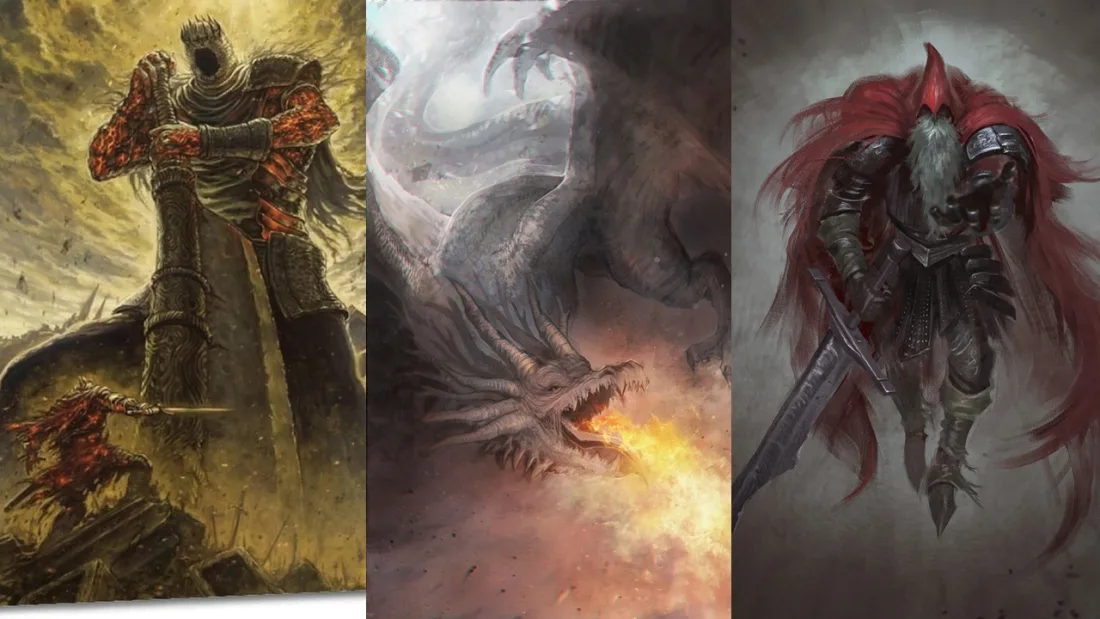
<p><a href="https://gamerode.com/tag/dark-souls-3/">Dark Souls 3 </a>is the third installment in a challenging trilogy of open-world RPGs developed by <a href="https://gamerode.com/tag/fromsoftware/">FromSoftware</a>. The game is filled with tough enemies, tricky traps, and unforgiving boss fights. These bosses are even more formidable than the characters in Cuphead, making them seem even more lighthearted in comparison.</p>


<p>Of course, the fans absolutely love it. After all, no Souls game is truly fulfilling without encountering a terrifyingly massive and vicious creature that is determined to end your life. That&#8217;s why we present to you: a detailed compilation of Dark Souls 3&#8217;s formidable bosses, along with some helpful tips to ensure you keep your head firmly intact.</p>


<p><strong>You Might Also Like:</strong></p>


<ul class="wp-block-list">
<li><a href="https://gamerode.com/tips/best-games-wizards-mages/">Games With Wizards And Mages</a></li>


<li><a href="https://gamerode.com/tips/games-created-genres/">Games That Started New Genres</a></li>


<li><a href="https://gamerode.com/tips/video-games-define-their-genres/">Games That Define Their Genres</a></li>
</ul>


<hr class="wp-block-separator has-alpha-channel-opacity"/>


<h2 class="wp-block-heading" id="h-dark-souls-3-bosses-in-order">Dark Souls 3 Bosses In Order</h2>


<figure class="wp-block-image size-large"><img src="http://gamerode.com/wp-content/uploads/2024/06/Dark-Souls-3-All-Bosses-Areas-Side-Quests-In-Order-Bos-1024x576.jpg" alt="Dark Souls 3 All Bosses Areas Side Quests In Order Bos" class="wp-image-8200"/></figure>


<p>Similar to all other Dark Souls games, Dark Souls 3 is packed with challenging and formidable bosses that are determined to defeat you. </p>


<p>These bosses range from the very first encounter with Iudex Gundyr to the ultimate battle against the Soul of Cinder, and also include numerous optional bosses. Here is a comprehensive list of all the bosses in Dark Souls 3, presented in chronological order.</p>


<ol class="wp-block-list">
<li>Iudex Gundyr</li>


<li>Vordt of the Boreal Valley</li>


<li>Curse-Rotted Greatwood</li>


<li>Crystal Sage ;</li>


<li>Deacons of the Deep</li>


<li>Abyss Watchers</li>


<li>High Lord Wolnir</li>


<li>Old Demon King</li>


<li>Pontiff Sulyvahn</li>


<li>Yhorm the Giant</li>


<li>Aldritch, Devourer of Gods</li>


<li>Dancer of the Boreal Valley</li>


<li>Dragonslayer Armour</li>


<li>Oceiros, the Consumed King</li>


<li>Champion Gundyr</li>


<li>Lothric, Younger Prince and Lorian, Elder Prince</li>


<li>Ancient Wyvern</li>


<li>Nameless King</li>


<li>Soul of Cinder</li>
</ol>


<hr class="wp-block-separator has-alpha-channel-opacity"/>


<h2 class="wp-block-heading" id="h-dark-souls-3-areas-in-order">Dark Souls 3 Areas In Order</h2>


<figure class="wp-block-gallery has-nested-images columns-default is-cropped wp-block-gallery-1 is-layout-flex wp-block-gallery-is-layout-flex">
<figure class="wp-block-image size-large"><img data-id="8199" src="http://gamerode.com/wp-content/uploads/2024/06/Dark-Souls-3-All-Bosses-Areas-Side-Quests-In-Order-Dark-Souls-3-1024x512.avif" alt="Dark Souls 3 All Bosses Areas Side Quests In Order Dark Souls 3" class="wp-image-8199"/></figure>
</figure>


<p>Dark Souls 3 is an incredibly expansive game, featuring a vast array of different locations for players to explore. </p>


<p>From the initial tutorial area known as the Cemetery of Ash, to the challenging Cathedral of the Deep, the game offers a wide variety of areas to traverse. Now, let&#8217;s take a look at all the different areas in Dark Souls 3, presented in chronological order.</p>


<ol class="wp-block-list">
<li>Cemetery of Ash (Iudex Gundyr)</li>


<li>Firelink Shrine</li>


<li>High Wall of Lothric (Vordt of the Boreal Valley; Dancer of the Boreal Valley)</li>


<li>Undead Settlement (Curse-Rotted Greatwood)</li>


<li>Road of Sacrifices (Crystal Sage)</li>


<li>Cathedral of the Deep (Deacons of the Deep)</li>


<li>Farron Keep (Abyss Watchers)</li>


<li>Catacombs of Carthus (High Lord Wolnir)</li>


<li>Smouldering Lake (Old Demon King)</li>


<li> ;Irithyll of the Boreal Valley (Pontiff Sulyvahn)</li>


<li>Anor Londo (Aldrich, Devourer of Gods)</li>


<li>Irithyll Dungeon</li>


<li>Profaned Capital (Yhorm the Giant)</li>


<li>Consumed King’s Garden (Oceiros, The Consumed King)</li>


<li>Untended Graves (Champion Gundyr)</li>


<li>Lothric Castle (Dragonslayer Armour)</li>


<li>Grand Archives (Lothric, Younger Prince and Lorian, Elder Prince, Crystal Sage)</li>


<li>Archdragon Peak (Ancient Wyvern, The Nameless King)</li>


<li> ;Kiln of the First Flame (Soul of Cinder)</li>
</ol>


<hr class="wp-block-separator has-alpha-channel-opacity"/>


<h2 class="wp-block-heading" id="h-dark-souls-3-all-side-quests-in-order">Dark Souls 3 – All Side Quests In Order</h2>


<figure class="wp-block-gallery has-nested-images columns-default is-cropped wp-block-gallery-2 is-layout-flex wp-block-gallery-is-layout-flex">
<figure class="wp-block-image size-large"><img data-id="8198" src="http://gamerode.com/wp-content/uploads/2024/06/Dark-Souls-3-All-Bosses-Areas-Side-Quests-In-Order-Side-Quest-1024x512.avif" alt="Dark Souls 3 All Bosses Areas Side Quests In Order Side Quest" class="wp-image-8198"/></figure>
</figure>


<p>Dark Souls 3 is filled with numerous side quests for players to embark on. However, similar to other games in the Souls series, these side quests can be quite challenging to discover. </p>


<p>Fortunately, in this section of our Dark Souls 3 guide, we will provide you with the locations where you can initiate these side quests. It is important to note that this guide assumes you are progressing through the bosses and areas in a relatively straightforward manner, as indicated in our previous lists.</p>


<ul class="wp-block-list">
<li>Fire Keeper (Area – Cathedral of the Deep) ; ; ;</li>


<li>Siegward of Catarina (Area – Cathedral of the Deep) ; ;</li>


<li>Irina of Carim, Eygon of Carim and Karla (Area – Cathedral of the Deep)</li>


<li>Anri of Astora (Area – Cathedral of the Deep)</li>


<li>Leonhard (Area – Cathedral of the Deep)</li>


<li>Sirris of the Sunless Realms (Area – Farron Keep) ;</li>


<li>Yoel of Londor, Yuria of Londor, Anri of Astoria and Lord of Hollows (Area – Farron Keep) ; ; ;</li>


<li>Orbeck of Vinheim (Area – Farron Keep) ; ;</li>


<li>Hawkwood (Area – Farron Keep) ; ;</li>


<li>Anri of Astora (Area – Catacombs of Carthus) ;</li>


<li>Anri of Astora (Area – Smouldering Lake)</li>


<li>Anri of Astora Part 2 (Area – Smouldering Lake)</li>


<li>Greirat of the Undead Settlement (Area – Irithyll of the Boreal Valley) ; ;</li>


<li>Sirris of the Sunless Realms (Area – Irithyll of the Boreal Valley) ; ;</li>


<li>Anri of Astora and Yuria of Londor (Area – Irithyll of the Boreal Valley)</li>


<li>Siegward of Catarina and Greirat of the Undead Settlement (Area – Irithyll of the Boreal Valley)</li>


<li>Siegward of Catarina (Area – Irithyll Dungeon) ; ;</li>


<li>Hawkwood (Area – Irithyll Dungeon) ; ; ;</li>


<li>Siegward of Catarina (Area – Profaned Capital) ; ; ; ;</li>


<li>Anri of Astora (Area – Anor Londo) ;</li>


<li>Sirris of the Sunless Realms (Area – Anor Londo) ;</li>


<li>Leonhard (Area – Anor Londo) ; ;</li>


<li>Greirat of the Undead Settlement (Area – Lothric Castle) ;</li>


<li>Irina of Carim and Eygon of Carim (Area – Lothric Castle) ; ; ;</li>


<li>Sirris of the Sunless Realms (Area – Lothric Castle) ; ; ; ; ; ;</li>


<li>Fire Keeper (Area – Untended Graves) ; ; ; ; ;</li>


<li>Hawkwood (Area – Archdragon Peak) ;</li>


<li>Fire Keeper (Area – Kiln of the First Flame)</li>


<li>Hawkwood (Area – Firelink Shrine)</li>


<li>Greirat of the Undead Settlement (Area – High Wall of Lothric)</li>


<li>Leonhard (Area – High Wall of Lothric) ;</li>


<li>Greirat of the Undead Settlement (Area – Undead Settlement)</li>


<li>Cornyx of the Great Swamp (Area – Undead Settlement) ;</li>


<li>Siegward of Catarina (Area – Undead Settlement)</li>


<li>Irina of Carim and Eygon of Carim (Area – Undead Settlement) ;</li>


<li>Yoel of Londor (Area – Undead Settlement)</li>


<li>Yuria of Londor (Area – Undead Settlement)</li>


<li>Leonhard (Area – Undead Settlement)</li>


<li>Irina of Carim and Eygon of Carim (Area – Road of Sacrifices)</li>


<li>Anri of Astora and Horace the Hushed (Area – Road of Sacrifices) ; ;</li>


<li>Sirris of the Sunless Realms (Area – Road of Sacrifices) ; ;</li>


<li>Hawkwood (Area – Road of Sacrifices) ; ;</li>


<li>Orbeck of Vinheim (Area – Road of Sacrifices) ; ;</li>


<li>Unbreakable Patches (Area – Cathedral of the Deep) ; ;</li>


<li>Unbreakable Patches Part 2 (Area – Cathedral of the Deep) ;</li>
</ul>


<hr class="wp-block-separator has-alpha-channel-opacity"/>


<h2 class="wp-block-heading" id="h-every-single-dark-souls-3-boss-in-order">Every Single Dark Souls 3 Boss In Order</h2>


<h3 class="wp-block-heading" id="h-1-iudex-gundyr">1. Iudex Gundyr</h3>


<figure class="wp-block-gallery has-nested-images columns-default is-cropped wp-block-gallery-3 is-layout-flex wp-block-gallery-is-layout-flex">
<figure class="wp-block-image size-large"><img data-id="8196" src="http://gamerode.com/wp-content/uploads/2024/06/Dark-Souls-3-All-Bosses-Areas-Side-Quests-In-Order-Ludex-Gundyr-1024x512.avif" alt="Dark Souls 3 All Bosses Areas Side Quests In Order Ludex Gundyr" class="wp-image-8196"/><figcaption class="wp-element-caption">Dark Souls 3 All Bosses Areas Side Quests In Order Ludex Gundyr</figcaption></figure>
</figure>


<p>The initial boss in Dark Souls 3 is unavoidable and serves as a significant challenge. Overcoming this boss grants players access to Firelink Shrine, a secure area where they can interact with non-playable characters (NPCs) and enhance their character&#8217;s abilities. </p>


<p>To initiate the battle, players must extract the Coiled Sword from Iudex&#8217;s chest, an item that is crucial for activating the bonfire leading to Firelink Shrine.</p>


<p>The battle against Iudex in Dark Souls 3 consists of two distinct stages. During the initial phase, Iudex wields a halberd-like weapon that enables him to perform sweeping or slicing attacks. </p>


<p>However, once his health drops below half, the fight transitions into the second phase. In this phase, a reptilian creature bursts out of Iudex&#8217;s body, granting him an increased range and posing a greater threat to the player.</p>


<h3 class="wp-block-heading" id="h-2-vordt-of-the-boreal-valley">2. Vordt Of The Boreal Valley</h3>


<figure class="wp-block-gallery has-nested-images columns-default is-cropped wp-block-gallery-4 is-layout-flex wp-block-gallery-is-layout-flex">
<figure class="wp-block-image size-large"><img data-id="8195" src="http://gamerode.com/wp-content/uploads/2024/06/Dark-Souls-3-All-Bosses-Areas-Side-Quests-In-Order-Vordt-of-the-Boreal-Valley-1024x576.jpg" alt="Dark Souls 3 All Bosses Areas Side Quests In Order Vordt Of The Boreal Valley" class="wp-image-8195"/><figcaption class="wp-element-caption">Dark Souls 3 All Bosses Areas Side Quests In Order Vordt Of The Boreal Valley</figcaption></figure>
</figure>


<p>The formidable creature in Dark Souls 3 known as Vordt wields a mace, not to be confused with bug repellent spray. Vordt possesses the ability to charge in a straight line multiple times in rapid succession. </p>


<p>It is important to monitor your stamina bar during these charges, as running out of stamina before Vordt finishes can lead to a swift defeat. When Vordt reaches half of its health, it enhances itself, making it more challenging to inflict significant damage. </p>


<p>Additionally, Vordt begins to utilize an ice breath attack that extends in a wide area directly in front of it. To avoid this attack, it is advisable to position yourself behind Vordt.</p>


<h3 class="wp-block-heading" id="h-3-curse-rotted-greatwood">3. Curse-Rotted Greatwood</h3>


<figure class="wp-block-gallery has-nested-images columns-default is-cropped wp-block-gallery-5 is-layout-flex wp-block-gallery-is-layout-flex">
<figure class="wp-block-image size-large"><img data-id="8194" src="http://gamerode.com/wp-content/uploads/2024/06/Dark-Souls-3-All-Bosses-Areas-Side-Quests-In-Order-Curse-Rotted-Greatwood-1024x576.jpg" alt="Dark Souls 3 All Bosses Areas Side Quests In Order Curse Rotted Greatwood" class="wp-image-8194"/><figcaption class="wp-element-caption">Dark Souls 3 All Bosses Areas Side Quests In Order Curse Rotted Greatwood</figcaption></figure>
</figure>


<p>Discovered in the Undead Settlement and revered by the people living there, the Curse-Rotted Greatwood is an enormous tree that possesses immense strength. It possesses a set of powerful strike moves that can cause the release of a damaging substance, so it is crucial to steer clear of these pools during the fight. </p>


<p>Once a specific amount of damage has been inflicted on its vulnerable areas, both you and the Greatwood will plummet into a pit, signaling the start of the second phase.</p>


<p>During this stage of the battle, the boss becomes even more dangerous by inflicting severe damage through actions such as falling to the ground or using its limbs to spin and roll towards you. </p>


<p>If you prefer ranged combat over close-quarters combat, utilizing spells like Pestilent Mist or Pyromancy can be effective. These magic abilities can target multiple vulnerable areas of the boss with area-of-effect attacks.</p>


<h3 class="wp-block-heading" id="h-4-crystal-sage">4. Crystal Sage</h3>


<figure class="wp-block-gallery has-nested-images columns-default is-cropped wp-block-gallery-6 is-layout-flex wp-block-gallery-is-layout-flex">
<figure class="wp-block-image size-large"><img data-id="8193" src="http://gamerode.com/wp-content/uploads/2024/06/Dark-Souls-3-All-Bosses-Areas-Side-Quests-In-Order-Crystal-Sage-1024x512.avif" alt="Dark Souls 3 All Bosses Areas Side Quests In Order Crystal Sage" class="wp-image-8193"/><figcaption class="wp-element-caption">Dark Souls 3 All Bosses Areas Side Quests In Order Crystal Sage</figcaption></figure>
</figure>


<p>The boss known as Crystal Sage has a distinctive wide-brimmed hat and possesses the power to teleport. Additionally, it relies on spell-based attacks that can inflict various degrees of damage. To effectively confront this boss, it is recommended to focus on staggering them, which will open up opportunities to land multiple quick strikes.</p>


<p>Be cautious! In the second phase of the Crystal Sage boss fight in Dark Souls 3, it has the ability to summon powerful copies of itself. These copies can inflict significant damage. Utilizing ranged attacks will be advantageous in dealing with these copies, as melee-focused characters may find it challenging to defeat this boss.</p>


<h3 class="wp-block-heading" id="h-5-deacons-of-the-deep">5. Deacons Of The Deep</h3>


<figure class="wp-block-gallery has-nested-images columns-default is-cropped wp-block-gallery-7 is-layout-flex wp-block-gallery-is-layout-flex">
<figure class="wp-block-image size-large"><img data-id="8192" src="http://gamerode.com/wp-content/uploads/2024/06/Dark-Souls-3-All-Bosses-Areas-Side-Quests-In-Order-Deacons-of-the-Deep-1024x576.jpg" alt="Dark Souls 3 All Bosses Areas Side Quests In Order Deacons Of The Deep" class="wp-image-8192"/><figcaption class="wp-element-caption">Dark Souls 3 All Bosses Areas Side Quests In Order Deacons Of The Deep</figcaption></figure>
</figure>


<p>Once you have unlocked the Cathedral of the Deep in Dark Souls 3, you will have the opportunity to face a group of clerics who are protecting the wandering soul of the Archdeacon. During the battle, one of the Deacons will be possessed by a red glow, which represents the soul.</p>


<p>It is important to target the enemies that have the soul in order to progress to the next phase of the fight. In the second phase, only one of the Deacons will have the soul for the remainder of the battle, while the others will try to defend him from the player. </p>


<p>Therefore, it is advisable to either move around them or attack multiple Deacons at once to increase your chances of success.</p>


<h3 class="wp-block-heading" id="h-6-abyss-watchers">6. Abyss Watchers</h3>


<figure class="wp-block-gallery has-nested-images columns-default is-cropped wp-block-gallery-8 is-layout-flex wp-block-gallery-is-layout-flex">
<figure class="wp-block-image size-large"><img data-id="8191" src="http://gamerode.com/wp-content/uploads/2024/06/Dark-Souls-3-All-Bosses-Areas-Side-Quests-In-Order-Abyss-Wastcher-1024x576.webp" alt="Dark Souls 3 All Bosses Areas Side Quests In Order Abyss Wastcher" class="wp-image-8191"/><figcaption class="wp-element-caption">Dark Souls 3 All Bosses Areas Side Quests In Order Abyss Wastcher</figcaption></figure>
</figure>


<p>Situated at the furthest point of Farron Keep, the Abyss Watchers house the essence of a powerful Lord of Cinder. </p>


<p>Initially, players face off against a single boss armed with a sword. However, as the battle progresses, two additional adversaries will enter the fray. </p>


<p>This is a common occurrence in Dark Souls, where encounters with multiple bosses are not uncommon.</p>


<p>In Dark Souls 3, there is a unique encounter with two corpses. After defeating one of the corpses, it will come back to life. </p>


<p>However, the other corpse, which has glowing red eyes, will not only resurrect but also attack the central boss and the other corpse. Once the central boss is defeated, it will revive again for the second phase of the battle.</p>


<h3 class="wp-block-heading" id="h-7-high-lord-wolnir">7. High Lord Wolnir</h3>


<figure class="wp-block-gallery has-nested-images columns-default is-cropped wp-block-gallery-9 is-layout-flex wp-block-gallery-is-layout-flex">
<figure class="wp-block-image size-large"><img data-id="8190" src="http://gamerode.com/wp-content/uploads/2024/06/Dark-Souls-3-All-Bosses-Areas-Side-Quests-In-Order-High-Lord-Wolnir-1024x576.webp" alt="Dark Souls 3 All Bosses Areas Side Quests In Order High Lord Wolnir" class="wp-image-8190"/><figcaption class="wp-element-caption">Dark Souls 3 All Bosses Areas Side Quests In Order High Lord Wolnir</figcaption></figure>
</figure>


<p>Situated at the conclusion of the Catacombs of Carthus, you will encounter a colossal skeleton with a multitude of formidable attacks that demand utmost caution. This formidable adversary possesses the ability to summon skeletons at its whim and wields a massive sword capable of devastatingly sweeping across your path.</p>


<p>When facing High Lord Wolnir in Dark Souls 3, it is highly recommended to prioritize breaking his shackles during the battle. Each broken shackle will significantly reduce one-third of his health. </p>


<p>While it is technically possible to defeat him without breaking the shackles, it is not advisable to do so because of his immense health capacity. Therefore, it is important to utilize any available assistance or aid to increase your chances of success against this formidable boss.</p>


<h3 class="wp-block-heading" id="h-8-old-demon-king">8. Old Demon King</h3>


<figure class="wp-block-gallery has-nested-images columns-default is-cropped wp-block-gallery-10 is-layout-flex wp-block-gallery-is-layout-flex">
<figure class="wp-block-image size-large"><img data-id="8189" src="http://gamerode.com/wp-content/uploads/2024/06/Dark-Souls-3-All-Bosses-Areas-Side-Quests-In-Order-Old-Demon-King-1024x512.avif" alt="Dark Souls 3 All Bosses Areas Side Quests In Order Old Demon King" class="wp-image-8189"/><figcaption class="wp-element-caption">Dark Souls 3 All Bosses Areas Side Quests In Order Old Demon King</figcaption></figure>
</figure>


<p>The Old Demon King is an infernal adversary located in the depths of Smouldering Lake. This formidable boss is encircled by lifeless demon bodies and possesses a fiery nature. </p>


<p>The Old Demon King exhibits his power by conjuring fiery rings, spewing molten lava, and launching fireballs at the player through hammer swings and ground pounds.</p>


<p>The first phase of the boss fight is more challenging compared to the second phase. In the second phase, the boss follows a more predictable attack pattern, starting with a few close-range attacks before transitioning to a ranged attack.</p>


<p>Surprisingly, in this particular Dark Souls battle, the difficulty actually decreases as the fight progresses.</p>


<h3 class="wp-block-heading" id="h-9-pontiff-sulyvahn">9. Pontiff Sulyvahn</h3>


<figure class="wp-block-gallery has-nested-images columns-default is-cropped wp-block-gallery-11 is-layout-flex wp-block-gallery-is-layout-flex">
<figure class="wp-block-image size-large"><img data-id="8188" src="http://gamerode.com/wp-content/uploads/2024/06/Dark-Souls-3-All-Bosses-Areas-Side-Quests-In-Order-Pontiff-Sulyvahn-1024x547.webp" alt="Dark Souls 3 All Bosses Areas Side Quests In Order Pontiff Sulyvahn" class="wp-image-8188"/><figcaption class="wp-element-caption">Dark Souls 3 All Bosses Areas Side Quests In Order Pontiff Sulyvahn</figcaption></figure>
</figure>


<p>In Dark Souls 3, one of the challenging bosses players encounter is Pontiff Sulyvahn. Defeating him is necessary to progress to the final part of Irithyll of the Boreal Valley. Pontiff Sulyvahn wields both a Fire Sword and a Magic Sword, making him an exceptionally formidable opponent.</p>


<p>It is crucial to ensure that your stamina is replenished to increase your chances of survival. In the second phase of the battle, Pontiff is accompanied by a phantom clone whose main objective is to distract and disrupt you. It is vital to stay focused on Pontiff and evade the clone&#8217;s attacks as effectively as possible.</p>


<h3 class="wp-block-heading" id="h-10-yhorm-the-giant">10. Yhorm, The Giant</h3>


<figure class="wp-block-gallery has-nested-images columns-default is-cropped wp-block-gallery-12 is-layout-flex wp-block-gallery-is-layout-flex">
<figure class="wp-block-image size-large"><img data-id="8187" src="http://gamerode.com/wp-content/uploads/2024/06/Dark-Souls-3-All-Bosses-Areas-Side-Quests-In-Order-Yhorm-1024x561.jpg" alt="Dark Souls 3 All Bosses Areas Side Quests In Order Yhorm" class="wp-image-8187"/><figcaption class="wp-element-caption">Dark Souls 3 All Bosses Areas Side Quests In Order Yhorm</figcaption></figure>
</figure>


<p>Yhorm, a Lord of Cinder, is a formidable boss in Dark Souls 3. As his name suggests, he is known for his immense size and the destructive power he possesses. Yhorm is notorious for unleashing devastating attacks that can shake the ground beneath him. </p>


<p>Additionally, he is capable of swiping backwards to defend himself if you attempt to approach him from behind.</p>


<p>A very effective weapon to use against Yhorm in Dark Souls 3 is the Storm Ruler. This powerful weapon can be discovered near Yhorm&#8217;s throne and is capable of inflicting significant damage on the Lord of Cinder. </p>


<p>To maximize your damage output, it is advised to strike Yhorm immediately after he performs any of his attacks. Additionally, it is crucial to focus your attacks on his head for optimal results.</p>


<h3 class="wp-block-heading" id="h-11-aldritch-devourer-of-gods">11. Aldritch, Devourer Of Gods</h3>


<figure class="wp-block-gallery has-nested-images columns-default is-cropped wp-block-gallery-13 is-layout-flex wp-block-gallery-is-layout-flex">
<figure class="wp-block-image size-large"><img data-id="8186" src="http://gamerode.com/wp-content/uploads/2024/06/Dark-Souls-3-All-Bosses-Areas-Side-Quests-In-Order-Aldrich-1024x576.jpg" alt="Dark Souls 3 All Bosses Areas Side Quests In Order Aldrich" class="wp-image-8186"/><figcaption class="wp-element-caption">Dark Souls 3 All Bosses Areas Side Quests In Order Aldrich</figcaption></figure>
</figure>


<p>Aldritch, one of the powerful Lords of Cinder, lives up to his intimidating name as a formidable boss in Dark Souls 3. Engaging in a battle with him can be quite frightening due to his diverse range of attacks. </p>


<p>From long-range arrow shots to soul spears and spin attacks that drain your health, Aldritch poses a significant challenge. However, targeting his tail can deal substantial damage and consecutive attacks can disrupt his movements. </p>


<p>Victory lies in focusing on this vulnerable area, but it is crucial to remain constantly mobile and avoid standing still during the entire fight.</p>


<h3 class="wp-block-heading" id="h-12-dancer-of-the-boreal-valley">12. Dancer Of The Boreal Valley</h3>


<figure class="wp-block-gallery has-nested-images columns-default is-cropped wp-block-gallery-14 is-layout-flex wp-block-gallery-is-layout-flex">
<figure class="wp-block-image size-large"><img data-id="8185" src="http://gamerode.com/wp-content/uploads/2024/06/Dark-Souls-3-All-Bosses-Areas-Side-Quests-In-Order-Dancer-of-the-Boreal-Valley-1024x576.webp" alt="Dark Souls 3 All Bosses Areas Side Quests In Order Dancer Of The Boreal Valley" class="wp-image-8185"/><figcaption class="wp-element-caption">Dark Souls 3 All Bosses Areas Side Quests In Order Dancer Of The Boreal Valley</figcaption></figure>
</figure>


<p>There are two ways to reach the Dancer of the Boreal Valley boss in Dark Souls 3. The first way is by defeating three Lords of Cinder and getting teleported to the boss area. </p>


<p>The second way is by killing Emma, the High Priestess of Lothric Castle. Regardless of how you reach her, the Dancer of the Boreal Valley is a challenging boss to face. She wields a flame sword and her attacks are reminiscent of elegant dance moves.</p>


<p>As the battle progresses to the second phase, it becomes even more intricate as the Dancer wields an ash sword alongside its original weapon, showcasing its deadly prowess as a dual-wielder. If you possess enough skill, it is possible to break the Dancer&#8217;s poise, effectively stopping its attacks in their tracks.</p>


<h3 class="wp-block-heading" id="h-13-dragonslayer-armour">13. Dragonslayer Armour</h3>


<figure class="wp-block-gallery has-nested-images columns-default is-cropped wp-block-gallery-15 is-layout-flex wp-block-gallery-is-layout-flex">
<figure class="wp-block-image size-large"><img data-id="8184" src="http://gamerode.com/wp-content/uploads/2024/06/Dark-Souls-3-All-Bosses-Areas-Side-Quests-In-Order-Dragonslayer-Armor-1024x576.jpg" alt="Dark Souls 3 All Bosses Areas Side Quests In Order Dragonslayer Armor" class="wp-image-8184"/><figcaption class="wp-element-caption">Dark Souls 3 All Bosses Areas Side Quests In Order Dragonslayer Armor</figcaption></figure>
</figure>


<p>Controlled by the Pilgrim Butterflies, this lifeless armor is not without deadly assaults or bone-shattering strikes. However, this adversary may be more intimidating in appearance than in actual threat. </p>


<p>Despite the fearsome appearance of Dragonslayer Armour and its menacing greataxe, the true danger lies in its powerful greatshield. Failure to properly defend oneself can result in being struck by two or three-hit combos. </p>


<p>In the second phase of the battle, the Pilgrim Butterflies will begin launching projectiles from both sides of the bridge. Thankfully, these projectiles can be easily evaded by rolling out of harm&#8217;s way.</p>


<h3 class="wp-block-heading" id="h-14-oceiros-the-consumed-king">14. Oceiros, The Consumed King</h3>


<figure class="wp-block-gallery has-nested-images columns-default is-cropped wp-block-gallery-16 is-layout-flex wp-block-gallery-is-layout-flex">
<figure class="wp-block-image size-large"><img data-id="8183" src="http://gamerode.com/wp-content/uploads/2024/06/Dark-Souls-3-All-Bosses-Areas-Side-Quests-In-Order-Oceiros-1024x576.jpg" alt="Dark Souls 3 All Bosses Areas Side Quests In Order Oceiros" class="wp-image-8183"/><figcaption class="wp-element-caption">Dark Souls 3 All Bosses Areas Side Quests In Order Oceiros</figcaption></figure>
</figure>


<p>Oceiros, a boss in Dark Souls 3, is known for his excessive talking and can be found in the garden below Lothric Castle. Despite his preoccupation with an imaginary baby, Oceiros is still a formidable opponent who attacks with his staff and tail. </p>


<p>However, if you position yourself under him and keep your shield up, you can easily evade his attacks in both phases. In the second phase, Oceiros becomes even more unpredictable, using his claws, fangs, and unleashing crystal breath attacks whenever possible.</p>


<h3 class="wp-block-heading" id="h-15-champion-gundyr">15. Champion Gundyr</h3>


<figure class="wp-block-gallery has-nested-images columns-default is-cropped wp-block-gallery-17 is-layout-flex wp-block-gallery-is-layout-flex">
<figure class="wp-block-image size-large"><img data-id="8182" src="http://gamerode.com/wp-content/uploads/2024/06/Dark-Souls-3-All-Bosses-Areas-Side-Quests-In-Order-Champion-GUndyr.jpg" alt="Dark Souls 3 All Bosses Areas Side Quests In Order Champion Gundyr" class="wp-image-8182"/><figcaption class="wp-element-caption">Dark Souls 3 All Bosses Areas Side Quests In Order Champion Gundyr</figcaption></figure>
</figure>


<p>Do you recall Iudex Gundyr, the initial boss in Dark Souls 3? Well, brace yourself because he has returned as Champion Gundyr, and he is even more formidable this time around. Once you have successfully defeated Oceiros, you can venture into Untended Graves, where you will encounter the lurking presence of Champion Gundyr.</p>


<p>The bosses in Dark Souls 3, specifically Champion Gundyr, can be quite intimidating with their constant barrage of fast attacks. Even in the second phase, their relentless combos can be overwhelming. </p>


<p>However, with practice, you can learn their patterns and find opportunities to strike. Parrying is an effective strategy to counter Champion Gundyr as it can stun him and create an opening for you to attack.</p>


<h3 class="wp-block-heading" id="h-16-lothric-younger-prince">16. Lothric, Younger Prince</h3>


<figure class="wp-block-gallery has-nested-images columns-default is-cropped wp-block-gallery-18 is-layout-flex wp-block-gallery-is-layout-flex">
<figure class="wp-block-image size-large"><img data-id="8181" src="http://gamerode.com/wp-content/uploads/2024/06/Dark-Souls-3-All-Bosses-Areas-Side-Quests-In-Order-lothric-1024x576.webp" alt="Dark Souls 3 All Bosses Areas Side Quests In Order Lothric" class="wp-image-8181"/><figcaption class="wp-element-caption">Dark Souls 3 All Bosses Areas Side Quests In Order Lothric</figcaption></figure>
</figure>


<p>Lothric, the younger prince, is the second-to-last boss in Dark Souls 3. He possesses incredible magical abilities which are enhanced by his brother, Lorian, the elder prince. </p>


<p>Lothric primarily relies on three devastating magic projectile attacks, while Lorian&#8217;s sword strikes add an additional layer of difficulty to the fight. </p>


<p>These combined attacks make the battle challenging to navigate and require careful strategy to overcome.</p>


<p>Starting off with an advantage, the battle with Lothric in Dark Souls 3 progresses gradually without immediate difficulty spikes. In the first phase, Lothric presents ample opportunities for attacking. </p>


<p>Moving on to the second phase, he frequently recovers from his magic attacks, leaving himself open to counterattacks. Additionally, Lorian, the elder brother, is easier to handle when he is at a distance, allowing players to strike during the pauses between his attack combinations.</p>


<h3 class="wp-block-heading" id="h-17-ancient-wyvern">17. Ancient Wyvern</h3>


<figure class="wp-block-gallery has-nested-images columns-default is-cropped wp-block-gallery-19 is-layout-flex wp-block-gallery-is-layout-flex">
<figure class="wp-block-image size-large"><img data-id="8180" src="http://gamerode.com/wp-content/uploads/2024/06/Dark-Souls-3-All-Bosses-Areas-Side-Quests-In-Order-Ancient-Wyvern-1024x576.webp" alt="Dark Souls 3 All Bosses Areas Side Quests In Order Ancient Wyvern" class="wp-image-8180"/><figcaption class="wp-element-caption">Dark Souls 3 All Bosses Areas Side Quests In Order Ancient Wyvern</figcaption></figure>
</figure>


<p>Defeating the Ancient Wyvern, an optional boss in Dark Souls 3, is surprisingly straightforward. You have two options: you can either use the traditional method of attacking it with a bow and arrow, or you can try a sneakier approach by circling around it to the left. </p>


<p>By taking this path, you&#8217;ll eventually reach a ledge that is positioned right above the Wyvern&#8217;s head. Wait for the Wyvern to lower its head, then jump down and claim victory. </p>


<p>However, despite the apparent simplicity of this strategy, it&#8217;s important to note that the Wyvern&#8217;s attacks are still extremely dangerous. Its fiery breath has the potential to burn you to ashes, and its tail swipe can be lethal if you&#8217;re not cautious.</p>


<h3 class="wp-block-heading" id="h-18-nameless-king">18. Nameless King</h3>


<figure class="wp-block-gallery has-nested-images columns-default is-cropped wp-block-gallery-20 is-layout-flex wp-block-gallery-is-layout-flex">
<figure class="wp-block-image size-large"><img data-id="8179" src="http://gamerode.com/wp-content/uploads/2024/06/Dark-Souls-3-All-Bosses-Areas-Side-Quests-In-Order-Nameless-King-1024x576.webp" alt="Dark Souls 3 All Bosses Areas Side Quests In Order Nameless King" class="wp-image-8179"/><figcaption class="wp-element-caption">Dark Souls 3 All Bosses Areas Side Quests In Order Nameless King</figcaption></figure>
</figure>


<p>The Nameless King is an optional boss in Dark Souls 3 that offers an extra level of difficulty for players seeking a challenge. This boss, who rides a wyvern, proves to be quite formidable. </p>


<p>During the first phase of the battle, the Nameless King soars through the air atop his wyvern, unleashing powerful attacks of fire, air, and lightning. Additionally, he is skilled in close combat and can use his spear to launch melee assaults.</p>


<p>After defeating the wyvern, the creature known as the &#8220;King of the Storm&#8221; transforms into the Nameless King and unleashes a relentless assault of lightning attacks. Although he is agile, players can stagger him, making it advisable to wear lighter gear in order to keep up with his swift strikes.</p>


<h3 class="wp-block-heading" id="h-19-soul-of-cinder">19. Soul Of Cinder</h3>


<figure class="wp-block-gallery has-nested-images columns-default is-cropped wp-block-gallery-21 is-layout-flex wp-block-gallery-is-layout-flex">
<figure class="wp-block-image size-large"><img data-id="8178" src="http://gamerode.com/wp-content/uploads/2024/06/Dark-Souls-3-All-Bosses-Areas-Side-Quests-In-Order-Soul-of-Cinder-1024x576.webp" alt="Dark Souls 3 All Bosses Areas Side Quests In Order Soul Of Cinder" class="wp-image-8178"/><figcaption class="wp-element-caption">Dark Souls 3 All Bosses Areas Side Quests In Order Soul Of Cinder</figcaption></figure>
</figure>


<p>The ultimate boss in Dark Souls 3, named Soul of Cinder, is a formidable enemy that combines the powers of all the Lords of Cinder. This epic final battle presents a significant challenge, but with skill and perseverance, it can be conquered.</p>


<p>Similar to numerous other bosses in the game, the Soul of Cinder in Dark Souls 3 also has two distinct phases. During the first phase, this boss possesses the ability to passively heal itself and recover a significant portion of its health. </p>


<p>To overcome this challenge, players are advised to adopt an aggressive approach and deal heavy damage to gradually deplete the boss&#8217;s health. </p>


<p>By doing so, they can progress to the second phase of the battle, where the Soul of Cinder channels the power and moveset of Gwyn, the initial Lord of Cinder and the ultimate boss encountered in the original Dark Souls game.</p>


<h3 class="wp-block-heading" id="h-20-champion-s-gravetender-and-gravetender-greatwolf">20. Champion&#8217;s Gravetender And Gravetender Greatwolf</h3>


<figure class="wp-block-gallery has-nested-images columns-default is-cropped wp-block-gallery-22 is-layout-flex wp-block-gallery-is-layout-flex">
<figure class="wp-block-image size-large"><img data-id="8177" src="http://gamerode.com/wp-content/uploads/2024/06/Dark-Souls-3-All-Bosses-Areas-Side-Quests-In-Order-Graventender-1024x562.webp" alt="Dark Souls 3 All Bosses Areas Side Quests In Order Graventender" class="wp-image-8177"/><figcaption class="wp-element-caption">Dark Souls 3 All Bosses Areas Side Quests In Order Graventender</figcaption></figure>
</figure>


<p>Upon entering the painted world in the initial DLC of Dark Souls 3, known as Ashes of Ariandel, players will find themselves incessantly pursued by a formidable Greatwolf. </p>


<p>This relentless creature not only emits haunting howls but also calls upon other wolves to launch attacks against the player. In order to put an end to this relentless pursuit, players must bravely explore the icy, treacherous depths of the DLC and successfully defeat the Greatwolf.</p>


<p>In the beginning, it may appear that you only have to face the Gravetender, and the battle will be similar to that of an invader controlled by the game&#8217;s AI. </p>


<p>However, as the fight progresses, the Greatwolf will appear and attack with its freezing breath. Although this duo battle can be challenging, you should have enough resources to handle it.</p>


<h3 class="wp-block-heading" id="h-21-sister-friede">21. Sister Friede</h3>


<figure class="wp-block-gallery has-nested-images columns-default is-cropped wp-block-gallery-23 is-layout-flex wp-block-gallery-is-layout-flex">
<figure class="wp-block-image size-large"><img data-id="8176" src="http://gamerode.com/wp-content/uploads/2024/06/Dark-Souls-3-All-Bosses-Areas-Side-Quests-In-Order-Sister-Friede-1024x539.avif" alt="Dark Souls 3 All Bosses Areas Side Quests In Order Sister Friede" class="wp-image-8176"/><figcaption class="wp-element-caption">Dark Souls 3 All Bosses Areas Side Quests In Order Sister Friede</figcaption></figure>
</figure>


<p>If you enjoy challenging bosses with multiple stages, then you&#8217;ll be thrilled to face Sister Freide in Dark Souls 3. This formidable boss battle consists of not just two, but three distinct phases that you must overcome to emerge victorious. </p>


<p>Initially, you&#8217;ll face Freide alone, but brace yourself as her father enters the fight to make it even more intense. Finally, in the last phase, you&#8217;ll once again face Freide solo, but this time she&#8217;ll unleash powerful fiery attacks, making the encounter even more daunting.</p>


<p>Out of all the bosses in Dark Souls 3, this particular boss bears the strongest resemblance to the bosses in Bloodborne, as it shares a similar fast-paced and aggressive combat style. </p>


<p>For a significant period of time, it was considered to be one of the toughest battles in the game, alongside the Nameless King, establishing its formidable reputation within the franchise.</p>


<h3 class="wp-block-heading" id="h-22-demon-in-pain-demon-from-below-and-demon-prince">22. Demon In Pain, Demon From Below, And Demon Prince</h3>


<figure class="wp-block-gallery has-nested-images columns-default is-cropped wp-block-gallery-24 is-layout-flex wp-block-gallery-is-layout-flex">
<figure class="wp-block-image size-large"><img data-id="8175" src="http://gamerode.com/wp-content/uploads/2024/06/Dark-Souls-3-All-Bosses-Areas-Side-Quests-In-Order-Demon-in-Pain-1024x576.jpg" alt="Dark Souls 3 All Bosses Areas Side Quests In Order Demon In Pain" class="wp-image-8175"/><figcaption class="wp-element-caption">Dark Souls 3 All Bosses Areas Side Quests In Order Demon In Pain</figcaption></figure>
</figure>


<p>Dark Souls 3&#8217;s second and last DLC installment, The Ringed City, offers a thrilling experience with an impressive lineup of bosses. Unlike its predecessor, this DLC introduces twice the number of bosses, each providing an unforgettable battle. </p>


<p>The initial boss encounter is the Demon Prince, a formidable opponent that presents a two-phase challenge, reminiscent of the iconic Ornstein and Smough fight in terms of design.</p>


<p>The reason for this is that you will initially encounter two demons at the same time, namely the demon In Pain and the demon From Below. Depending on which demon you defeat last, the battle with the Prince will be altered. </p>


<p>As a result, the creature&#8217;s moveset will vary significantly, making the process of battling it repeatedly more thrilling compared to other bosses that have a more predictable behavior.</p>


<h3 class="wp-block-heading" id="h-23-halflight-spear-of-the-church">23. Halflight, Spear Of The Church</h3>


<figure class="wp-block-gallery has-nested-images columns-default is-cropped wp-block-gallery-25 is-layout-flex wp-block-gallery-is-layout-flex">
<figure class="wp-block-image size-large"><img data-id="8174" src="http://gamerode.com/wp-content/uploads/2024/06/Dark-Souls-3-All-Bosses-Areas-Side-Quests-In-Order-Halflight-1024x576.webp" alt="Dark Souls 3 All Bosses Areas Side Quests In Order Halflight" class="wp-image-8174"/><figcaption class="wp-element-caption">Dark Souls 3 All Bosses Areas Side Quests In Order Halflight</figcaption></figure>
</figure>


<p>When you step into the boss arena of Halflight, you might encounter a challenging battle against an NPC invader or face the daunting task of fighting against an actual player. </p>


<p>This unique feature is due to the ability of players belonging to the Spears of the Church covenant to be summoned as bosses in this required section.</p>


<p>If you&#8217;re not familiar with player-versus-player combat, be prepared for a tough fight. If you&#8217;re finding Dark Souls 3 Bosses too difficult, you have the option to switch the game to offline mode and face Halflight as a solo player. </p>


<p>Although you won&#8217;t be able to seek assistance from other players, you should have sufficient strength by this point in the game to take on this enemy without encountering significant difficulties.</p>


<h3 class="wp-block-heading" id="h-24-darkeater-midir">24. Darkeater Midir</h3>


<figure class="wp-block-gallery has-nested-images columns-default is-cropped wp-block-gallery-26 is-layout-flex wp-block-gallery-is-layout-flex">
<figure class="wp-block-image size-large"><img data-id="8173" src="http://gamerode.com/wp-content/uploads/2024/06/Dark-Souls-3-All-Bosses-Areas-Side-Quests-In-Order-Darkeater-Midir-1024x512.avif" alt="Dark Souls 3 All Bosses Areas Side Quests In Order Darkeater Midir" class="wp-image-8173"/><figcaption class="wp-element-caption">Dark Souls 3 All Bosses Areas Side Quests In Order Darkeater Midir</figcaption></figure>
</figure>


<p>While not necessary to complete the DLC The Ringed City, Darkeater Midir offers a challenging and exciting encounter for players seeking a formidable dragon boss fight in Dark Souls 3. </p>


<p>This optional boss provides an opportunity for additional content and a satisfying challenge, especially for those who desired a more intense experience after facing the Ancient Wyvern.</p>


<p>The battle in Dark Souls 3 against this particular boss is quite reminiscent of a similar fight in one of the DLCs of Dark Souls 2, specifically the encounter with Sinh, the Slumbering Dragon. </p>


<p>This not only pays homage to an already impressive battle but also enhances it, creating a challenging and noteworthy fight that can be considered one of the toughest throughout the entire Dark Souls trilogy.</p>


<h3 class="wp-block-heading" id="h-25-slave-knight-gael">25. Slave Knight Gael</h3>


<figure class="wp-block-gallery has-nested-images columns-default is-cropped wp-block-gallery-27 is-layout-flex wp-block-gallery-is-layout-flex">
<figure class="wp-block-image size-large"><img data-id="8172" src="http://gamerode.com/wp-content/uploads/2024/06/Dark-Souls-3-All-Bosses-Areas-Side-Quests-In-Order-Slave-Knight-Gael-1024x551.webp" alt="Dark Souls 3 All Bosses Areas Side Quests In Order Slave Knight Gael" class="wp-image-8172"/><figcaption class="wp-element-caption">Dark Souls 3 All Bosses Areas Side Quests In Order Slave Knight Gael</figcaption></figure>
</figure>


<p>The initial boss encountered in both DLCs ultimately becomes the ultimate test, as Slave Knight Gael emerges as the final boss battle in The Ringed City and in Dark Souls 3 as a whole. </p>


<p>Gael embarked on a personal mission to obtain the Dark Soul, and while the Soul of Cinder represented a fusion of all those who fueled the flame, Gael embodies the essence of all those who sought to extinguish it.</p>


<p>Gael, the final boss in Dark Souls 3, is known for his impressive moveset and relentless aggression, even surpassing the Nameless King in difficulty. To defeat Gael, players will need to give it their all. </p>


<p>The boss fight takes place in a spacious arena that allows for plenty of maneuverability, giving players the opportunity to showcase their preferred gameplay styles. This epic battle with Gael is undoubtedly one of the most unforgettable moments in the series.</p>


<p>For more content on ;<strong>List ;</strong>check out the relevant links below and any of our guides, list of games, and news on ;<a href="https://gamerode.com/">Gamerode</a>.</p>

Dark Souls 3 All Bosses, Areas & Side Quests In Order
Dark Souls 3